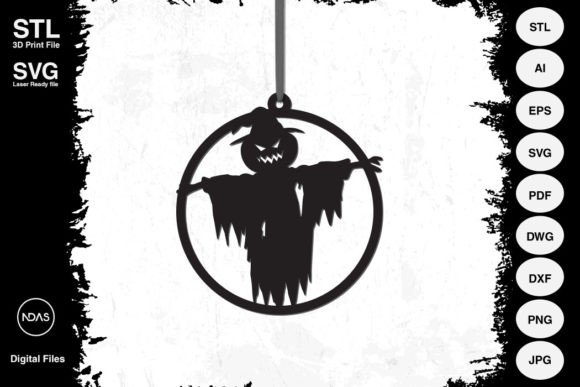
Evaluating the Halloween Scarecrow Decoration Ornament: A Guide to Digital Craft Files
The autumn season brings with it a specific set of aesthetic expectations, and few symbols are as instantly recognizable or versatile as the scarecrow. For crafters, designers, and DIY enthusiasts, the Halloween Scarecrow Decoration Ornament has emerged as a popular choice for seasonal decor. However, the modern crafting landscape is no longer limited to pre-made plastic figures found in big-box stores. Instead, there is a growing shift toward digital fabrication tools—specifically laser cutting and 3D printing—that allow for highly customized, scalable, and material-specific results.
This article explores the distinct advantages of using digital files (STL, SVG, DXF) for creating scarecrow ornaments. It compares these methods against traditional crafting approaches, evaluates the tradeoffs involved in material selection, and helps readers determine which format best suits their skill level and project goals. Whether you are looking to create a delicate paper cutout or a sturdy wooden door hanger, understanding the nuances of these digital assets is crucial for a successful outcome.
Understanding the Format: Vector vs. Mesh
To make an informed decision, one must first understand the technical difference between the file types associated with this ornament. The product description typically includes a suite of formats: STL, AI, SVG, EPS, PDF, DXF, DWG, PNG, and JPG. These are not merely redundant backups; they serve fundamentally different manufacturing processes.
- Vector Files (SVG, AI, EPS, DXF, DWG): These are mathematical representations of lines and curves. They are resolution-independent, meaning you can scale them up to the size of a building or down to the size of a fingernail without losing quality. These are essential for laser cutters, vinyl plotters (like Cricut or Silhouette), and CNC routers. The inclusion of both Adobe Illustrator (AI) and generic vector formats ensures compatibility across various design software suites.
- Raster Images (PNG, JPG): These are pixel-based images. While useful for visualizing the final design or printing on standard inkjet printers, they cannot be used directly by laser cutters or 3D printers without being traced into vectors first. They serve primarily as reference guides.
- Mesh Files (STL): This is the standard format for 3D printing. An STL file describes the surface geometry of a three-dimensional object. Unlike vectors, which define edges, STLs define volume. This allows for the creation of ornaments that have depth, texture, and structural integrity beyond a simple flat plane.
The distinction here is critical. If your goal is to hang a lightweight decoration on a Christmas tree or a window, vector files are generally more efficient. If you aim to create a textured, dimensional piece that stands on its own or casts interesting shadows, the STL file becomes the primary asset.
Comparing Production Methods: Laser Cutting vs. 3D Printing
Once the file type is selected, the next decision involves the production method. The Halloween Scarecrow Decoration Ornament is designed to be compatible with both, but each method offers different strengths and limitations.
Laser Cutting and Vinyl Plotting
Laser cutting utilizes high-powered lasers to burn through materials like wood, acrylic, and MDF. For smaller projects, electronic cutting machines like Cricut or Silhouette use blades to slice through thinner materials such as cardstock, vinyl, and thin plywood.
Advantages:
- Speed and Efficiency: You can produce multiple identical copies of the scarecrow ornament quickly. This is ideal for party favors or bulk decorations.
- Clean Edges: Laser cutting provides precise, sealed edges that often require little to no post-processing.
- Material Variety: As noted in the specifications, this method works well with plywood, cardboard, paper, and acrylic. The ability to switch between rustic burlap-textured wood and sleek modern acrylic allows for significant stylistic variation.
Limitations:
- Flatness: Unless you are layering multiple pieces (a technique known as "relief carving"), the result is inherently two-dimensional. The dimensions provided (X 4.5, Y 4.85 inches) refer to the footprint of this flat plane.
- Material Thickness Constraints: Laser power limits the thickness of material you can cut. Very thick hardwoods may char excessively or fail to cut completely.
3D Printing
Using the included STL file, users can print the ornament using FDM (Fused Deposition Modeling) or SLA (Stereolithography) printers. The Z-dimension of approximately 0.25 inches suggests a relatively low-profile relief sculpture rather than a fully volumetric statue.
Advantages:
- Texture and Depth: 3D printing captures fine details, such as the weave of the scarecrow’s hat or the texture of its straw, in a way that laser cutting cannot unless complex multi-layering is employed.
- Structural Integrity: The printed part is a single, solid piece, eliminating the need for adhesives or assembly required in layered vector projects.
- Customization: Users can adjust infill density or wall thickness in their slicing software to balance durability with material usage.
Limitations:
- Time Consumption: Printing a small ornament can take significantly longer than cutting a dozen out of wood in minutes.
- Post-Processing: Depending on the printer technology, support structures may need to be removed, and surfaces may require sanding or painting to achieve a professional finish.
Material Selection and Aesthetic Outcomes
The choice of material dramatically influences the final look and feel of the Halloween Scarecrow Decoration Ornament. Because the digital files are scalable, the same design can evoke very different moods based on the substrate used.
Wood and MDF: These materials offer a classic, rustic charm that aligns perfectly with the traditional imagery of a scarecrow. Plywood, in particular, adds a natural grain texture that enhances the organic feel. MDF provides a smooth, uniform surface that is excellent for painting if you wish to apply custom colors beyond the natural wood tone.
Cardboard and Paper: For temporary installations, classroom decorations, or children’s crafts, paper and cardboard are cost-effective and easy to work with using hand-cutting tools or basic electronic cutters. However, they lack durability and are susceptible to moisture damage.
Acrylic and Plastic: Using the vector files with acrylic creates a modern, contemporary interpretation of the scarecrow. Transparent or colored acrylic can catch light in unique ways, making the ornament suitable for indoor display where lighting plays a key role. For 3D printing, PLA or PETG plastics offer vibrant color options and weather resistance if the ornament is to be used outdoors.
Metal: While possible with laser cutting, metal requires industrial-grade equipment. Thin sheet metal can create an industrial, edgy aesthetic, but it poses safety risks due to sharp edges and weight considerations for hanging ornaments.
Decision Factors: When to Choose Which Option
Selecting the right approach depends on several practical factors. Readers should consider their available tools, budget, and desired end-use.
Choose Vector/Laser Cutting If:
- You need to produce multiple copies of the ornament efficiently.
- You prefer working with natural materials like wood or fabric.
- You want a lightweight decoration that hangs easily from branches or walls.
- You do not have access to a 3D printer.
Choose 3D Printing If:
- You value intricate surface detail and texture over speed.
- You want a self-standing or robust ornament that does not rely on backing boards.
- You are experimenting with new materials like resin or flexible filaments.
- You have a 3D printer and wish to utilize existing hardware.
Consider Hybrid Approaches:
Advanced crafters often combine these methods. For instance, one might 3D print a detailed face or central element and mount it onto a laser-cut wooden background. This leverages the precision of both technologies, resulting in a high-end, custom piece that justifies the effort.
Practical Considerations for Success
Regardless of the method chosen, there are universal tips for working with the Halloween Scarecrow Decoration Ornament files.
- Scaling Correctly: The specified size is approximately 4.5 x 4.85 inches. Always verify your scaling settings in your design software before cutting or printing. A 10% error in scaling can result in parts that do not fit together or appear disproportionately large.
- Material Testing: Before committing to expensive materials like hardwood or acrylic, test the design on cheaper alternatives like cardboard or scrap wood. This helps identify any issues with fine details that might be too small for your machine’s resolution.
- Assembly Planning: If using layered vector designs, plan your assembly strategy. Use strong adhesives appropriate for your material (e.g., wood glue for wood, super glue for acrylic). For 3D prints, consider how you will attach hanging loops, either by designing them into the STL or adding string after printing.
- Finishing Touches: Raw laser-cut wood may have charred edges. Sanding lightly can improve appearance. Painted finishes should be applied before assembly when possible to ensure even coverage.
Conclusion
The availability of comprehensive digital files for the Halloween Scarecrow Decoration Ornament empowers creators to move beyond generic store-bought items. By understanding the differences between vector and mesh formats, and weighing the pros and cons of laser cutting versus 3D printing, users can select the method that best aligns with their resources and creative vision. Whether aiming for rustic charm with wood or modern precision with plastic, the flexibility of these digital assets ensures a satisfying and customizable Halloween decorating experience.